Replacing your roof in Yukon involves several important steps that guarantee your home stays safe and weather-resistant. From initial planning to final inspection, each phase plays a vital role in the project’s success. Understanding this timeline helps you prepare and stay informed throughout the process. As you consider your options, it’s useful to know what to expect at each stage—so you can better navigate the journey ahead.
Assessing Your Roof and Planning the Project
Before starting your roof replacement project, conducting a thorough assessment of the current condition of your roof is essential. You need to evaluate the extent of damage, leaks, or deterioration to determine if replacement is necessary.
During this assessment, consider your roof material options, such as asphalt shingles, metal, or wood, based on durability and style preferences.
Weather considerations are also critical; Yukon’s climate means you should plan your project during a season with minimal rain or snow to prevent delays.
Understanding your roof’s existing structure and choosing suitable materials will help you develop a realistic timeline.
Proper planning ensures your project proceeds smoothly, minimizes surprises, and results in a durable, weather-resistant roof that withstands Yukon’s harsh conditions.
Obtaining Necessary Permits and Approvals
Securing the necessary permits and approvals is a crucial step before starting your roof replacement project, as it guarantees you comply with local building codes and regulations. You’ll need to navigate the permit process, which involves submitting plans and documentation to your Yukon municipal office. Building codes specify standards for safety, materials, and installation methods, ensuring your roof meets community requirements. The permit process varies by location but generally includes an application, review, and approval phase. Understanding the importance of local climate considerations can help ensure your roof is designed and built to withstand weather challenges specific to Yukon. Failing to obtain the proper permits can lead to fines, delays, or even having to redo work. By proactively handling these steps, you protect your investment and stay compliant with Yukon’s regulations. Always check with local authorities to understand specific permit requirements for your roof replacement.
Scheduling Your Roof Replacement
Scheduling your roof replacement requires careful planning to make certain the project proceeds smoothly and minimizes disruptions. Start by coordinating with your contractor to set a timeline that aligns with your availability and the weather forecast. Material selection plays a key role; choose durable materials early to ensure timely delivery and avoid delays. Discuss contractor scheduling to confirm your preferred dates and account for any busy seasons in Yukon. Clear communication helps prevent misunderstandings and keeps the project on track. Be flexible with dates when possible, as supply chain issues or weather can impact timing. Additionally, understanding the typical roof replacement timeline in Yukon can help you plan effectively and set realistic expectations.
Preparing Your Property for the Installation
Preparing your property for roof installation involves taking practical steps to safeguard your surroundings and ensure a smooth process. First, clear your driveway and yard of any vehicles, outdoor furniture, or debris that could obstruct equipment or pose safety hazards.
Protect valuable landscaping by trimming trees or covering delicate plants with tarps. Make sure pathways are clear for workers and materials.
Consider weather conditions—if rain or snow is forecasted, reschedule to avoid delays and ensure roof safety. Secure loose objects around your home to prevent them from falling or causing accidents during installation.
Communicate with your contractor about any specific concerns, and follow their advice on prepping your property. Proper preparation minimizes risks and helps your roof replacement proceed efficiently.
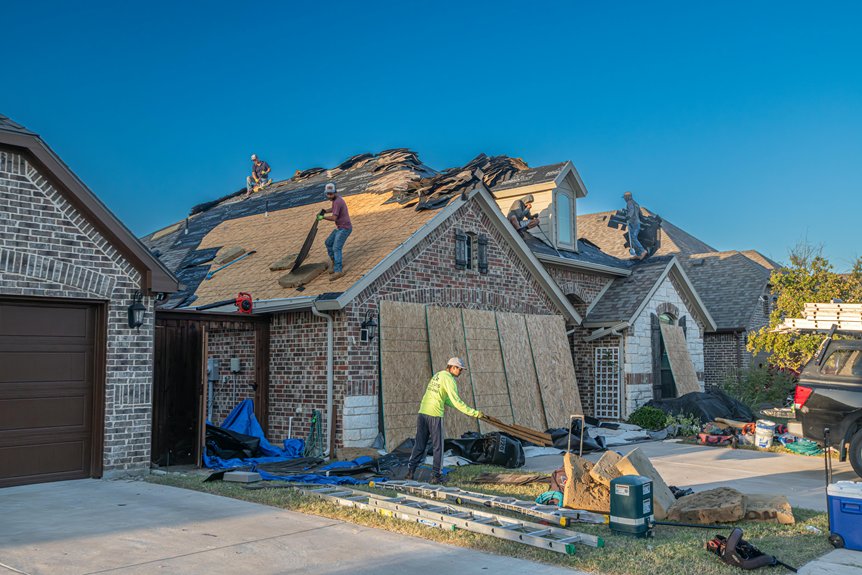
Removing the Old Roofing Material
Before new roofing material can be installed, you need to remove the existing roof. This process is called a roof tear off, where you carefully strip away shingles, flashing, and underlayment.
During this step, debris removal is vital to keep the work area safe and organized. You’ll likely use dumpsters or containers to collect old roofing materials, guaranteeing all waste is contained and disposed of properly.
Removing the old roof also gives you a clear view of the roof deck, making it easier to identify any underlying issues.
Be prepared for some noise and mess, but know that this step is essential for a solid, long-lasting new roof.
Taking your time now ensures a smoother installation later and helps prevent future problems.
Inspecting the Roof Deck and Repairing Damage
After removing the old roofing materials, it’s time to closely examine the roof deck for any damage or deterioration. During the roof deck inspection, look for rotting wood, water stains, or soft spots that indicate weakness.
Address any damage immediately to prevent future issues. Repairing damage involves replacing compromised sections of the deck and securing loose or warped areas. Use proper tools and materials to ensure a solid foundation for the new roof.
Skipping damage repair can lead to leaks, mold, and structural problems down the line. Be thorough in your inspection, and don’t overlook minor issues—they can become major repairs later.
Proper damage repair now guarantees a durable, long-lasting roof and helps avoid costly repairs in the future.
Installing the New Roofing System
Once the roof deck is fully repaired and ready, you can begin installing the new roofing system. You’ll start by laying down the chosen roofing materials, which could include shingles, metal panels, or membrane systems, depending on your project.
Proper installation techniques are vital to guarantee durability and weather resistance. You’ll carefully align and secure each layer, starting from the bottom edge and working upward to prevent water infiltration.
Sealants and fasteners are applied precisely to create a tight, weatherproof barrier. Throughout the process, you’ll monitor for proper overlaps and alignment, making adjustments as needed.
Using the right roofing materials and installation techniques guarantees a long-lasting roof that withstands Yukon’s harsh weather conditions.
Final Inspection and Quality Checks
As the roofing installation nears completion, conducting a thorough final inspection and quality check is crucial to guarantee everything meets your standards. Use an inspection checklist to systematically review every aspect of the new roof, from shingles and flashing to ventilation and sealants.
This step ensures that all materials are properly installed and free of defects. Quality assurance confirms that the work complies with industry standards and local building codes.
During the inspection, look for any signs of damage, loose components, or irregularities. Address issues immediately to prevent future problems.
A detailed final inspection not only verifies the integrity of your roof but also provides peace of mind, knowing your investment is protected and built to last.
Cleanup and Site Restoration
With the final inspection complete and any issues addressed, it’s time to focus on cleanup and site restoration. You’ll need to clear away landscaping debris, such as leftover shingles, nails, and packaging materials, to ensure your yard stays safe and neat.
The crew will also carefully remove tools and equipment, leaving the area tidy. Be sure to check that exterior furniture is protected or temporarily moved to prevent damage during the process.
Once the debris is cleared, the team will restore any disturbed landscaping, reseeding or replanting as needed. This step guarantees your property looks as good as new and that no hazards remain.
Proper cleanup not only enhances your home’s curb appeal but also guarantees a safe environment for your family to enjoy.
Final Walkthrough and Project Completion
Before concluding your roof replacement project, a thorough final walkthrough guarantees everything meets your expectations. During this review, inspect the new roof for any defects, missing shingles, or installation issues.
Confirm that all work aligns with your project budgeting and contract details. This step also guarantees you understand the specifics of your roof warranty, including what’s covered and how to file claims if needed.
Don’t hesitate to ask the contractor questions or request small adjustments before signing off. A comprehensive walkthrough helps prevent future surprises and confirms the job’s completion to your standards.
Once satisfied, you can officially finalize the project, knowing your investment is protected by your roof warranty and that all aspects of the job meet your expectations.
Conclusion
Once your new roof has been installed and inspected, it’s important to do a final walkthrough to ensure everything looks great. Be sure to clean up the site and review your warranty coverage. With your roof now prepared to withstand Yukon’s weather, you can enjoy peace of mind knowing your home is protected. Regular maintenance will help keep your roof in top condition for years to come. Your project is now complete, and your home is better protected. For more information on how to schedule your free roof inspection, call us at (405) 543-2920 or visit us online at Top View Roofing.