If your home in Midwest City has recently faced strong winds, it’s essential to evaluate your roof for damage. Windstorms can cause unseen issues that compromise your roof’s integrity, leading to costly repairs if left unaddressed. Recognizing the early signs and understanding your options can save you time and money. The key is knowing what steps to take next—so you can protect your home effectively and guarantee your roof remains durable against future storms.
Recognizing Signs of Wind Damage on Your Roof
Wind damage can often be subtle at first, making it easy to overlook. One of the first signs is hail impact marks on your shingles, which can weaken the protective layer and lead to leaks later. Also, check for shingle curling, where edges lift or bend, indicating the asphalt is losing adhesion. These issues often develop gradually, so regular inspections are essential. Recognizing local weather challenges like high winds helps homeowners stay vigilant and address issues promptly.
Look closely at your roof after storms, especially if hail accompanied high winds. Missing granules or dented shingles are clues that wind has compromised your roof’s integrity. Don’t dismiss minor imperfections; they can worsen over time and cause significant damage.
Recognizing these early signs helps you act quickly, potentially saving you money and preventing extensive repairs down the line.
Immediate Steps to Take After a Windstorm
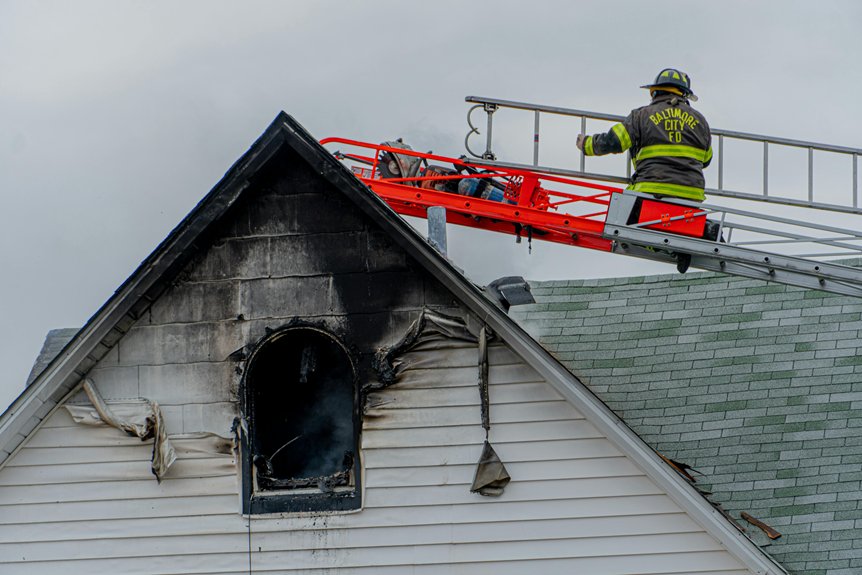
After a storm, your first priority should be ensuring your safety and evaluating any immediate dangers around your property. Check for downed power lines, broken glass, or unstable trees that could pose risks. Make sure everyone is safe and move to a secure location if needed.
Practice storm safety by staying indoors and avoiding windows during strong winds. It’s also essential to have emergency preparedness plans in place, like knowing how to contact emergency services or your insurance company.
Document any visible damage with photos for insurance claims later. If possible, cover broken windows or exposed areas with tarps to prevent further damage.
Taking these immediate steps helps protect you and your property while setting the stage for proper repair and assessment. Emergency preparedness is a crucial part of storm readiness that can make recovery smoother.
Assessing the Extent of Roof Damage
To properly assess the extent of roof damage, start by inspecting your roof safely from the ground if possible. Look for visible signs like missing shingles, curled edges, or debris scattered across your roof surface. Use binoculars if needed to get a closer view without risking safety.
During your roof inspection, check for dents or damage on gutters and vents, which can indicate further issues. Pay attention to any sagging or water stains on interior ceilings, as these are signs of potential leaks.
Conducting a thorough damage assessment helps you determine if professional evaluation is necessary. Remember, safety always comes first; avoid climbing onto the roof if it’s unsafe or unstable.
A careful damage assessment provides a solid foundation for planning repairs or replacement.
How Insurance Claims Work for Wind Damage
Once you’ve completed your damage assessment and identified the extent of the harm, it’s time to navigate the insurance claim process. Start by contacting your insurance company to report the wind damage. They’ll guide you through their insurance process, which includes submitting claim documentation like photos, repair estimates, and a detailed description of the damage.
Be thorough and organized to avoid delays. An insurance adjuster will schedule an inspection to verify the damage and assess the scope of repairs. After their review, you’ll receive an estimate of coverage and a claim settlement offer.
Understanding how the insurance process works can help you streamline your claim and ensure you get the necessary funds for roof replacement.
Choosing the Right Roofing Contractor in Midwest City
Choosing the right roofing contractor in Midwest City is essential to guarantee your roof replacement is done correctly and lasts for years to come. Start by verifying that the contractor holds valid licensing, ensuring they meet local requirements and standards. A licensed contractor demonstrates professionalism and accountability.
Additionally, ask about roofing warranties—reliable warranties protect your investment and provide peace of mind if issues arise later. Be cautious of contractors who can’t provide proof of licensing or detailed warranty information.
Research reviews and ask for references to confirm their reputation. A reputable contractor will be transparent about their licensing and warranty policies, showing confidence in their work.
Making an informed choice now prevents headaches and costly repairs down the line.
The Roof Replacement Process Explained
After selecting a trusted roofing contractor, understanding the steps involved in the roof replacement process can help you feel more confident and prepared. It begins with a thorough roof inspection, where the contractor assesses the damage, identifies hidden issues, and determines the scope of work.
Next, you’ll discuss material selection, choosing from options like asphalt shingles, metal, or tiles, based on durability and aesthetics. Once materials are selected, the contractor will schedule the replacement, often starting with removing the old roof carefully to prevent further damage.
The new roofing materials are then installed, following manufacturer guidelines and safety standards. Finally, a quality check guarantees everything is secure and properly aligned before completing the project and cleaning up the site.
Tips for Maintaining Your Roof Post-Replacement
Proper maintenance is essential to protect your new roof and maximize its lifespan. Regular gutter maintenance helps prevent water backups that can cause leaks or damage. Clear out debris and ensure gutters are securely attached, especially after storms.
Additionally, check roof ventilation to promote airflow, reducing heat buildup and moisture that can lead to mold or rot. Proper ventilation also extends the life of your roofing materials.
Inspect your roof periodically for signs of damage, such as missing shingles or flashing issues, and address problems promptly. Keep trees trimmed to prevent branches from damaging the roof during storms.
Conclusion
After a windstorm, act quickly to spot damage, document it, and contact a licensed roofer. Properly handling insurance claims and choosing experienced professionals guarantees your roof gets replaced correctly, protecting your home from future storms. Regular maintenance after the replacement keeps your roof in top shape and extends its lifespan. Staying proactive helps you safeguard your home and maintain peace of mind for years to come. For more information on how to schedule your free roof inspection, call us at (405) 543-2920 or visit us online at Top View Roofing.