As a homeowner in Edmond, maintaining your roof’s integrity is essential, and roof flashing plays a key role in keeping water out. If you notice signs of damage or want to prevent future issues, understanding how to repair or replace flashing can save you money and headaches. Properly addressing these issues now can extend your roof’s lifespan—so, let’s explore what it takes to keep your home protected from water intrusion.
Understanding the Role of Roof Flashing in Your Home
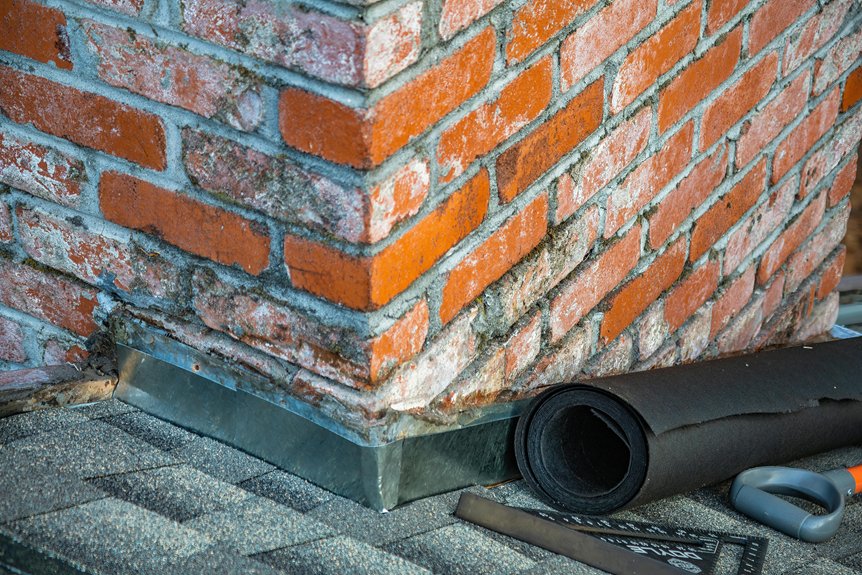
Roof flashing plays a crucial role in protecting your home from water damage. It acts as a barrier, directing water away from vulnerable areas like chimneys, vents, and valleys. Proper installation and maintenance of flashing are essential to ensure a long-lasting roof, especially in regions prone to storms and extreme weather. Your choice of roofing materials influences how flashing is installed and maintained, ensuring a seamless waterproofing system. Proper waterproofing techniques involve sealing joints and overlaps to prevent leaks. When installed correctly, flashing complements your roofing materials by providing an extra layer of defense against moisture infiltration. Without effective flashing, water can seep into your roof structure, causing damage over time. Understanding how flashing works within your roofing system helps you appreciate its importance and encourages regular inspections. Ultimately, proper flashing extends your roof’s lifespan and preserves the integrity of your home.
Common Signs of Flashing Damage and When to Act
Over time, even well-installed flashing can show signs of wear or damage that compromise its ability to keep water out. Look for visible cracks, gaps, or rust, which indicate deterioration. Loose or curling flashing can create openings for water to seep in, risking leaks and water damage.
You may notice water stains or mold around your roof’s edges, signaling compromised leak prevention. Pay attention to flashing around chimneys, vents, or skylights, as these are common trouble spots.
Regular maintenance tips include inspecting your flashing after storms and addressing minor issues early. Acting promptly when you spot damage ensures your roof remains watertight, preventing costly repairs later.
Recognizing these signs helps you keep your home protected and extend the lifespan of your roof.
Essential Tools and Materials for DIY Flashing Repairs
To successfully tackle DIY flashing repairs, gathering the right tools and materials is essential. You’ll need basic items like a caulking gun, roofing cement, and replacement flashing materials such as metal or peel-and-stick membranes.
A putty knife, wire brush, and utility knife help prepare the surface and remove old, damaged flashing.
Weatherproofing techniques require sealants, waterproof flashings, and roofing nails or screws to secure everything properly.
Make sure you have safety gear like gloves and goggles, especially when working on the roof.
Proper tools ensure you can perform flashing maintenance effectively, sealing leaks and preventing water intrusion.
Having these materials on hand allows you to address damage promptly and maintain the integrity of your roof’s weatherproofing.
Ensuring the durability of your repairs depends on using quality craftsmanship and durable materials that withstand Oklahoma’s weather conditions.
Step-by-Step Guide to Repairing or Replacing Flashing
Begin by inspecting the area to identify the damaged or missing sections of flashing. Look for signs of storm damage, such as bent, cracked, or lifted flashing materials.
Carefully remove any loose or compromised flashing using a pry bar and roofing shovel. If weather has caused rust or deterioration, replace the damaged sections with new flashing material that matches the existing setup.
Measure the length and width of the area needing repair, then cut the new flashing accordingly. Apply roofing cement or sealant along the edges for a watertight seal.
Position the new flashing, ensuring it overlaps existing materials properly, and secure it with nails or screws. Finish by checking for gaps or loose spots, and apply additional sealant if necessary.
When to Hire a Professional for Flashing Repairs
While some flashing repairs are straightforward for homeowners, there are times when hiring a professional is the safest and most effective choice. If your roof maintenance involves complex areas, high or steep roofs, or extensive damage, don’t jeopardize DIY safety.
Climbing on a roof without proper training can be dangerous, especially if you’re unfamiliar with safety precautions. Also, if water has already caused leaks or structural issues, a professional can accurately assess the damage and ensure proper repairs.
Conclusion
Maintaining your roof flashing is essential to prevent water damage and protect your Edmond home. Regular inspections, prompt repairs, and using the right tools help ensure your roof stays in top condition. If you notice extensive damage or feel unsure about the repairs needed, consider hiring a professional. Addressing flashing issues early can save you money and prevent further problems down the line. For more information on how to schedule your free roof inspection, call us at (405) 543-2920 or visit us online at Top View Roofing. Stay vigilant, and your roof will continue to keep your home safe and dry for years to come.